Wednesday, March 24, 2010

Starting the Neck


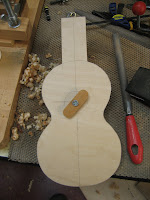
1.Take a piece of Mahogany blank measured approximately 15” x 3” x 7/8” and joint all 4 sides. Cut off two ends about 1 ¼” for heel and mark them to remember how they go in order when gluing for heel stack glue-up. First cut block will go on top of second block cut and those two will stack onto the back of the remaining long piece of the Mahogany blank. Stack the blocks like they will be glued onto the neck and mark a big “X” on the bottom and across the blocks so you remember how they are lined up.

2. Scarf cut a 15 degree angle at a mark measured from the bottom of the neck piece. Measure the length of how long your scale length is from where the 12th or 14 fret will attach to the soundbox. I have a 15” scale length and a 12th fret attachment so my length is 7 ½” add a little more (3/16”) to allow for the curve of the neck to line up with the curve of the soundbox. Make a mark here. This is where you will cut for the scarf joint.

3. Cut the scarf joint on the bandsaw using a sliding jig that goes into your miter slot on your bandsaw. To make the jig: Cut the slider piece out of a hardwood that is the exact measurement of your miter slot. I have a small tabletop 10” Rikon and don’t ask me why but the miter slot is not the standard width! Put some shims into the miter slot, add glue to the hardwood slider piece, put it into the miter slot on your bandsaw (glue face up), lay board on top and clamp. After dry, drill three small countersunk screws into the strip. Glue a block on the top of the board at a 15 degree angle and you’re ready to cut your scarf cut. Make sure your mark in #2 is lined up with the bandsaw blade. That is where you want to make the cut.

4. Glue the two heel blocks onto the end of the long neck piece, gluing up one to the neckpiece and then the next 1¼” block to that. Remember the order. It will match the grain of the neck. Also, glue up the scarf joint. Mike has a permanent stop block where his peghead will be. The peghead end that is chopped off can be slid down to determine your peghead thickness. Two Bessey clamps (KR3.512 ) are used for this operation. Wait a ½ an hour until dry.

5. Take neck over to the jointer or hand sand the sides of the neck.

6. Then take a carpenters marking gauge, find the center line and indent into the wood the center line. Mike didn’t mark the back of the neck but I would like to do that also. That way I can see the CL when I am carving the neck.

7. Mike has a Plexiglas side template he made up to draw the line of the neck and curve of the heel. That is cut out on the bandsaw.

8. Then he has another template to go against the center line of the roughcut neck piece to draw the width of the fretboard and peghead shape.


That's all for today. Next time we will start to carve the neck!


Tuesday, March 16, 2010

Binding


1. Trim off excess edge of back plate with flush edge router, then sand edges smooth with an orbital sander or like me (scared of power tools) hand sand with a sanding block.

2. Decide on purfling and binding material. It took me a while to decide because Mike had a plethora of binding materials available so it was hard to choose but I finally came up with a nice light curly maple strip with a thin line of black plastic for purfling to match my rosette design.

3. Mike explained how to measure the width of the combined binding and purfling material and how to come up with the right router bearing to use. My measurement came to .110”m, and then we added .010” for glue which comes to .120”. Because the router bearing # is determined by the diameter and not the radius we doubled the .120 by two, so now we have .240”. This is subtracted from 1.000 which is the cutter size and we get .760” for the router bearing size.

4. I am just binding the top of the uke. I like the continuation of the Ziricote on the sides and back so I’ve decided against binding the back. Mike has rigged up a laminate trimmer to stay perpendicular to the uke. I’ve seen one like it at the Stewart MacDonald site but Mike made this one himself.

5. After it is routed I went over it with a little sanding block to get the rough edges off.

6. Since I have chosen wood for the binding it needs to be bent in the side bender. The side of one-half of the uke is measured and two pieces of curly maple are trimmed to this length. The two pieces are taped together on the ends and then wetted down (not soaked). They are then placed in the side bender and bent just as the sides were done.

7. After binding is taken out of the bender, Mike shows me how he attaches the binding. He starts at the waist and clamps it with a little Quick-Grip clamp (inside of soundhole to side of uke) to hold it flush to the side. He tells me to be sure it is flat in the channel on the side and pushed up against the channel on the top. He adds just a drop of CA to hold it and then keeps going around. He sprays a little accelerator on the glue to speed drying. He uses flush-cut hobby scissors to make the end cut. When one side is done he continues with the other side. At the bottom you want to be careful to match the ends up as perfectly as possible. At the top it doesn’t matter because it will be covered by the neck.

8. After all the purfling and binding is glued, Mike uses an orbital sander to sand the binding smooth to the uke. I am nervous about the orbital so I continue with hand sanding. You may think I’m chicken but one of the other students went through his sides when sanding the binding because of being too aggressive and probably not staying parallel to the sides when sanding. These machines cut really quickly and if you’re not skilled or careful enough you can get into trouble. I feel I need to practice a little more on some practice material with that sander before I attempt to sand on something I really care about.

9. After that I just need to round the edges of my uke (with a hand sander block) and then the soundbox is complete! Ready to start the neck!


Wednesday, March 10, 2010

Back Plate Preparation


Now we start working with the back plate.

1. Thickness sand the back to about .070” thick. We mostly take it off of the inside of the back and run the outside just one time to give it a nice sanding.


2.Take the half-outside Plexiglas template and draw the centerline and the outline of the uke on the inside of the back plate with a pencil.


3. Make a pencil mark where the narrowest place on the uke is (at waist) and the widest place (lower bout). Mike has a clear Plexiglas template which he made which is about 6” x 12” with a red center line marked on it and two holes at the top (for hanging?). He places the red center line of the template over the centerline of the uke, lines the top of it to the narrow waist and then draws a horizontal line across the uke to indicate where the top brace will be. Do the same for the “widest part of uke” mark.


4. Cut two braces out of whatever brace material you want. Mine is spruce. Cut it the same length as the outline of the uke.


5. Mike takes a plastic template he has made which is about ½ “tall x 12” in length. It is tapered from the ½” top down to nothing at the end. So basically, it is a gentle curve. He places the brace material up to it and draws a line with a pencil to give the brace a nice arch. This line is to give him a reference to how much he is taking off at the belt sander.


6. So, take the brace to the belt sander and sand down a nice arch on the two braces. Like I said in #5, it doesn’t need to be down to the pencil line it just needs to be a nice symmetrical arch. You decide on how much of an arch you want.


7. Get center brace material and glue it down onto the center line of the uke back making sure you have left enough room for the head and tail blocks. Place a long caul over it and clamp in go-bar deck. Take out after about 10 minutes.


8. Run back plate through thickness sander to refine back brace.


9.Bevel edges of back center brace with a small plane and then finish sand with 3M block sander or other type of hand-block sander.


10. Lay horizontal braces over the center brace and mark with a pencil where they intersect. On the bandsaw notch out between the lines on the horizontal braces where the back brace will come in contact.


11. Glue horizontal braces on the back with two small Quick-Grip clamps at the ends with 3 cam clamps in between for the top brace and 5 cam clamps for the lower brace.


12. After the glue has dried you can carve the braces as the soundboard braces were done.


13. Put back plate on box (soundboard, sides and kerfing) and line up the centerlines and up to the outlines at the top and bottom. Mark where the braces stick out of the sides. This is where you will notch the kerfing so that the back lies flat the sides for glue up.


14.After you have made sure the back lies flat it is ready to “box up”, gluing the back to the soundboard and sides. Place soundboard and sides into the holding jig and clamp onto table. Put a bead of glue onto the kerfing and head and tail blocks. Take the back and line it up to the centerline at the tail and place a small Quick-Grip clamp to position. Take another Quick-grip clamp and position the top centerline. After the centerline is lined up clamp a couple of cam clamps at the tail block and at the head block. The small Quick-Grip clamps are taken off. Put maybe two more cam clamps at the sides of the lower bout and two at the upper bout.


15. Take off from the table and placed whole jig on the floor to continue to clamp all the way around the uke. Be careful to place clamps only where the sides are underneath the clamp and carefully tighten.


Monday, March 8, 2010

Getting Soundboard and Sides Ready for Back


1. Today I popped the soundboard and sides out of the mold. This was done with a gentle tap with a small rubber mallet.
2. Then soundboard edges are routed off at the router table. Be careful of the grain direction so wood does not chip out.
3. The uke is then sanded with an orbital sander being very careful to sand perpendicular to the uke. The orbital sander can cut quick and you don’t want to round off the edges where you may want to add binding later or sand the sides or soundboard too thin in general.
4. Clean up the inside of the uke by popping off any glue beads that may still be lurking with a gouge chisel. This is the chisel that looks like a spoon.
5. Mike takes his paper template of his sides that has a general shape of the dome that he would like his concert ukes to be and draws with pencil the shape onto the sides. At the upper bout it is approximately 2 3/8”, the lower bout is about 2 5/8” and at the higher point a little behind the waist area is 2 ¾”.
6. Sand down to the pencil line with the belt sander.
7. Now take the uke over to the 12’ sanding plate and sand the top of the sides (where the back will eventually be glued on) on the dish. Think of it as two sections. The upper bout and the lower bout. Sand the head and tail blocks so they are flush with the sides. A felt tip pen or pencil can be drawn on top to see when everything is flush if you like.
Measure sides periodically to see if you are right on.
8. Put uke onto a holding board jig ( board in the shape of the uke with a screw and a scrap of wood to go through soundboard of uke to hold uke in place while working on) and glue on back kerfing flush or a tad higher than sides with the special clothespins.
9. After that is dried, (at least 20 min.) again take over to the 12’ sanding plate and sand until everything is level.

Wednesday, March 3, 2010

Finishing Soundboard and Gluing to Sides


Today we will finish the uke soundboard as far as getting it to the point of gluing it to the sides which are still in the mold.

1.Horizontal braces are carved on each long side with a small hand plane and then dimensioned with a 1 ¼” wide Japanese Bench chisel. Touch those up with a 220 grit 3M sanding block and then scallop ends with a Two Cherries gouge.

2. Two pieces of spruce stock are then cut for the two fan braces. Line them up where they lay on the pencil marks you have drawn and mark two lines across where the bridge patch is. Take the piece over to the belt sander and shave away a little divot on the bottom of the piece where the bridge patch will be. This is so the fan brace will lie flat over the bridge patch. This can also be accomplished just using a half-round file if you don’t have a belt sander. In the past, I had meticulously taken care to carve out this spot so it would fit exactly over the bridge patch. Mike says this is not necessary. Glue to soundboard making sure to leave about a ¼” space at the top of each fan brace away from the mid-brace. The fan braces should not touch the mid-brace! These are in turn carved as the horizontal braces. Mike told me to flatten the tops of them a little bit. The ends of the braces are scalloped almost flush with the top of the soundboard. The only placed they should be left about a 1/16” tall is at the top of the fan braces. Here we need a little strength. He tells me the more wood you take away the louder your uke will be. There needs to be a happy balance between strength of the uke and how loud you can get it to be. Grams of wood shavings can be taken away here and there to make your uke project more sound. Though this can be a cost to strength.

3. Finish sand the inside of the soundboard and it is ready to glue to the sides!

4. Apply a bead of white woodworkers glue to the head and tail blocks and the kerfing that is in the mold. Line up the center line of the soundboard to the center line of the mold and first use two cam clamps at the tail block and then use two cam clamps at the head block. Mike showed me how to make sure the clamps are perpendicular to the bottom and to each other clamp. The clamp end should be just over the sides. If too far forward the sides can be crushed. When the soundboard is over the sides, one cannot see where the sides are. Before you glue and add the top you can mark your cam clamp with a pencil as to how for forward you can go with the cam clamp. After both ends are clamped, start filling rest of the side areas with cam clamps. This proved to be a very quick and relatively painless way to glue the soundboard on.

Next will be getting the back ready…

Continued from last post...


11.Glue upper horizontal brace with three cam clamps and two small Quick-Grip clamps. Do the same with the middle brace. Two small Quick-Grip clamps on both ends, with two cam clamps angled next to those with one more small Quick-grip which goes through soundhole to clamp the middle of the brace.

12.Now let’s get back to the sides that were placed in the mold. Pencil squiggly lines over the head and tail block. Take the mold over to the 30’ radius sanding plate and sand until the pencil marks are gone and the rough side edges are smooth.

13. Now glue kerfing to the top of the sides of where the soundboard top will be with clothes pins that are cut so they will give good clamping pressure to the angled kerfing. This is done quickly! Doesn’t have to be exactly flash with the top because we will be going back to the sanding plate for another go over.

And that’s it for today. Can’t wait for more tomorrow which will probably finishing the back with braces and then gluing the back and soundboard onto the sides.

Working on the Soundboard Continued


The soundhole was re-inlaid and completed.

1. Sand soundboard to 70 thousands of an inch through the drum sander. (You need at least100 thousands to do the rosette).
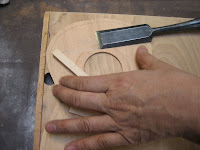
2. Making the soundboard patches- The soundhole patches are made by routing out circles a little larger than the circumference of your soundhole on a large sheet of thin Mahogany. Do not go all the way through. Stop a little short of going all the way through. Now take the board with the cut circles to the drum sander and put through sander. The circles will pop off. This way you won’t get any chip out on the back.

3. Glue the circle soundhole patch onto the back (of course!) of the soundboard. It is clamped into a go-bar deck type arrangement with a fancy caul that Mike created. He takes a square of ¾’ plywood that just covers the soundhole patch and notches the center lines into it. That way he can line up the vertical grain line of the soundboard patch with the vertical grain lines in the soundboard. This of course can also be made of Plexiglas. He has put a drill bit through the center of the caul so a little of it protrudes through the other side which will go into the hole drilled into the center hole of the soundhole. Go-bar clamps are just pieces of 3/8” dowel rounded on the ends. Nothing fancy here! And works perfectly. The dowels have plenty of spring-back to accommodate several different thicknesses of material. No need to raise and lower the upper deck!

4. The bridge patch is approximately 1 ¼” x 5”, made of mahogany with the grain orientation perpendicular to the vertical grain of the soundboard. Bevel the bridge patch to take off any stress points (sharp edges) on the ends. If you don’t the points on the bridge patch can create spits in the soundboard later on in the life of the ukulele. This is done on the sanding belt. Make it look like a tongue depressor. You can also bevel the long edges of the patch at this time also.

5.Marking the soundboard- Take the outside Plexiglas template and mark the two horizontal lines where the upper and middle braces will lie. On the soundhole patch mark where the soundhole cut will be made. Do this at the top of the patch and at the bottom. Measure 5/8” from this mark and that is where the brace should lie. Draw the horizontal lines to indicate where these braces should go. Also, at this time mark the outside perimeter line of the final uke shape and where the two fan braces should go. Mike explained to be how we are trying to create two separate vibrating areas on the ukulele. I had always let the top of the fan braces touch the middle brace but Mike explained how that would create a deadened space that didn’t need to be there. The ukulele soundboard should be able to vibrate at the upper and lower bouts together but independently of one another. Also, he tells me no need to add the center brace like I had done in the past. Why add more wood than is needed? It is not needed for more strength and without it the soundboard can vibrate more. Fan brace marks are eye-balled laying a ruler at the top of the center line (top of uke) and angling it downward in-between center line at lower bout and side of uke. Repeat on other side. Like I said, just eye-ball it. Also, mark where bridge should be.

6. Bridge patch is then glued on using the go-bar deck and dowels for clamps.

7. After the soundhole and bridge patch is glued on the soundhole is cut out. This is done on the drill press with a circle cutter.

8. Now hand-sand the back side of the soundboard with 150 grit paper to get rid of any left over glue, to round sound hole so that the rim of showing wood next to the rosette is even in case the circle cutter didn’t exactly cut the circle evenly and any rough edges. Finalize with 220 grit paper.

9. Cut off the top off of the soundboard patch where the horizontal braces will go. We do this with a small razor saw to the glue and then take a wide flat chisel to lift off the wood. Repeat at the bottom of the patch to expose wood to glue mid-brace.

10. Cut upper and lower brace stock about the same distance as the uke outline. Mark upper brace #1 and mid-brace #2. You don’t want to inadvertantly glue the shorter brace to the upper brace position. The brace material is approximately ¼” x 3/8”. Upper brace is swiped onto a flat sand-papered surface to make sure it is flat and mid-brace is arched by sanding onto a 30’ radius sanding plate to create a slight curved surface.