Wednesday, April 14, 2010

Putting the Two Together!


When inlaying the orchid into the ebony peghead at about a three-quarters of the way done my drill bit snapped off. Mike told me to just come over to his shop that he had plenty of bits for me to choose from.

So, today that is what I did.

1. Finish routing out the cavity for the orchid. Then put some black CA glue into cavity and press orchid in. It is not sprayed with accelerator because Mike says it can cause bubbles.

2. After glue has set, Mike took it over to the orbital sander and sanded the inlay flush. Usually there are little holes you need to go back over and stick a little CA into them and resand until there are no holes left.

3. Now the neck is ready to be attached to the soundbox! Mike dry fits the neck and soundbox and wraps a strap around the top of the peghead and the butt-end of the uke. He then takes a straightedge and sees if it is lined up. It looks good. If it isn’t he says you can bend the strap a little to one side or the other to align the neck. Since it looks good it is ready to glue up.

4. White glue is applied to the tenon of the neck and is spread with a small spatula. Put a very thin layer of glue where the underside of the fretboard will meet the soundbox. You don’t want too much squeeze out at the end of the fretboard.

5. Slide neck quickly in and give a good amount of pressure. Mike says sometimes if you have a really good dry fit after you apply the glue the neck might not want to push in. But fortunately that didn’t happen here. Clamp with the strap clamp around the peghead end and the butt end again of the uke. Clamp at the heel with a cam clamp and if needed a clamp through the soundhole, clamping the end of the fretboard to the box.

Hurray! It’s together! Tomorrow will be making the bridge.


Finishing Fretboard


Today we will finish the fretboard by installing the frets and dressing them. The end of the fretboard is designed and peghead inlay is routed out and inlaid.

1. Take rectangular scraper blade and line up in fret slot where your tack is seated. Tap scraper with a small hammer so tack goes into neck.

2. Place neck into vise and measure and mark where your position dots will lie. I have mine at the 3rd, 5th, 7th, 10th, and 12th fret positions. Center punch positions.


3. Measure position dots (if you don’t know) with a caliper and find a drill that will match your dots. Neck is held in a vise, positions are drilled, dots are placed and then CA glue is applied and then sprayed with activator. Neck is taken over to the sanding board and sanded until the dots (or position markers) are flush.

4. Mike then uses an orbital sander and sands the fretboard with 220 grit, then 320, then hits it with 1500 for a nice smooth finish.

5. I then made a pattern for the end of my fretboard by taking a piece of paper the width of the end of the fretboard and folded it in half and then drew a design and then cut (like paper dolls) the design out and rubber cemented it to where I wanted the fretboard to end. After a little drying, the cut out the line with a jewelers saw and sanded and finished the end.

6. The frets are then installed by trimming to size a little over what is needed and I just hammered in positioning neck on my leg and tapping in fret. Ends are cut with a fret end nipper. Cut the ends off as you go. A couple of my slots were a little wide so Mike showed me a neat trick. He dabs CA glue onto a very little plastic tubing (really small) and just touches the end of the fret with it. This technique only puts maybe a half of a drop of glue into the fret slot.

7. Mike then shows me how to dress the frets. A wide mill file is slid over the whole side of the fretboard very gently just getting the fret tangs. Then the sides of the frets are beveled either using a mill file or using a homemade or bought beveler. Mike’s is a block of wood with a slot at the angle you want and a file stuck into it. Then go over the bevels with a rubber block of 400 grit sandpaper. He then takes an offset diamond fret file (Stewart Macdonald #300) and goes over the tops of the beveled edges. A fret end dressing file (# 1175 Stew Mac) is used next running it over one side of the beveled edge. Just one light pass is needed. You don’t want to use too much pressure and create another burr. Go down one side of the fretboard, going from the first fret down to the next doing the upper side. Then do the same going up but on the other side of the bevel. This way you save time and assures all frets are covered. Of course, the touch test is the best thing to do to insure all frets are smooth. Then the little outside corners are filed using the same file.

8. Fretboard is then leveled with a long straight board with sandpaper glued to it. Just a light pass is needed.

9. Frets are then gone over with a 3200 polishing paper.

10. At this point Mike goes over the whole neck with an orbital sander with #320 sandpaper and gets out all file marks. He passes over everything; the back of the peghead, the whole length of the neck and the heel. He says if you do this the neck is done and all scratches are taken care of so that when you go to apply finish no scratches are to be seen.

11. Ebony peghead veneer is glued on right up to the fretboard “0” fret. It is clamped in a vise and left to dry. The sides are then sanded flush to the sides of the peghead and Mike sands the curved part of the peghead on the round part of the belt sander.

This neck of mine is ready to take home and finish cutting out the ebony at the top of the curved peghead and inlaying my orchid into the peghead.

Gluing on the Fretboard


1. Fretboard is clamped into vise positioned where you want it on top of neck with the “0” fret line perpendicular with the scarf cut angle. Two holes are hand-drilled with a very tiny drill bit into the first and 11th fret slots going into the neck (but not through neck!)

2. Mike cuts the plastic tops off of two tacks. They are the right diameter and have very sharp ends. These are tapped into the fretboard slots where you previously drilled. Pull the neck away and apply glue to the neck where fretboard will be attached and reattach to the neck.

3. Lay neck down with fretboard face down and clamp with three curved cauls and 4 cam clamps and let dry.

4. Cut off fretboard excess with the bandsaw and finish the sides so they are flush with the fretboard by using a small plane and a Japanese wide chisel. A wide file can also be used. Just be careful to keep sides of file perpendicular to the neck sides.

5. Then take over to a sanding board and sand to get sides flat.

Finish Shaping Heel


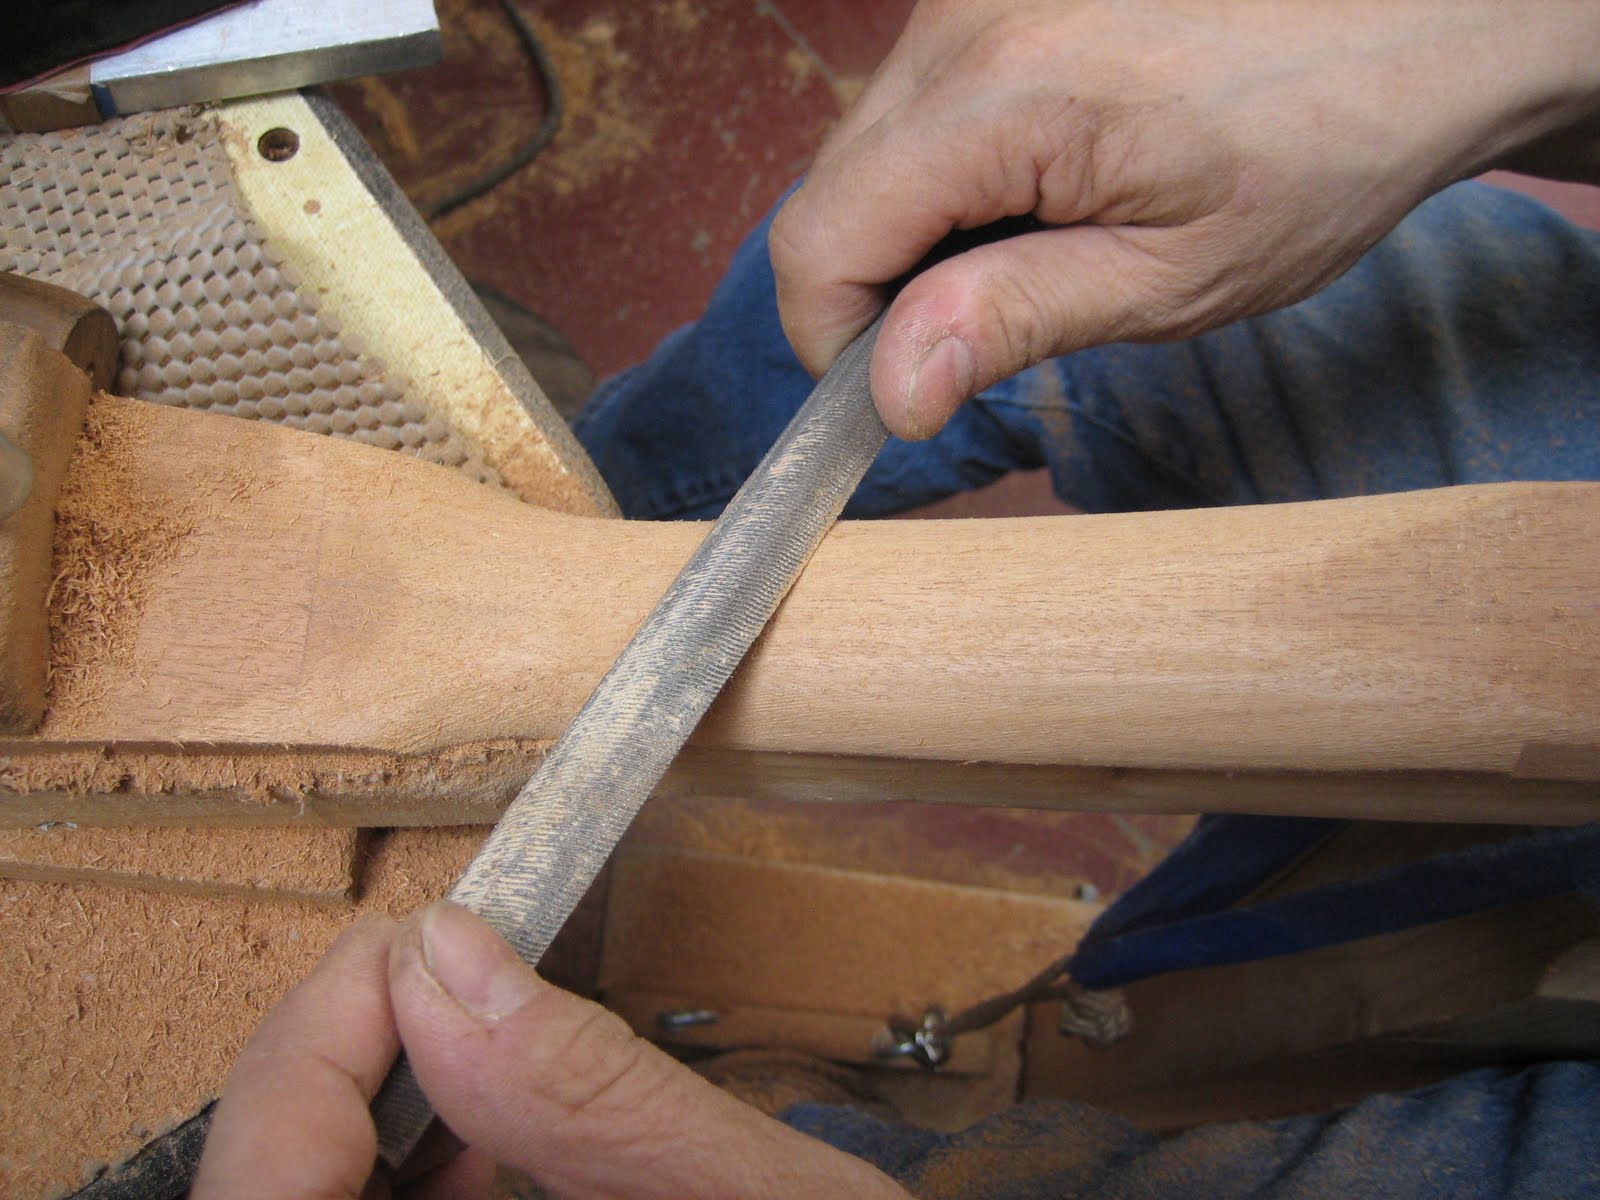
With the heel cap glued on it is now time to finish shaping the heel. It is something I really can’t explain by writing about it. All lines of heel must go into the lines of the neck and be aesthetically pleasing. Mike shows me how to hold the file, again using the Nickolson #50.

1. First we mark the center line of the heel cap placing the neck onto the body and continuing the CL of the body onto the heel cap.

2. Draw a heel cap shape that you want onto the heel cap piece.

3. Now draw a curved shape onto the bottom of the heel (part that will be attached to body). Mike has a Plexiglas template he uses. (See pg. 87 of Cumpiano’s book for an example).

4. You can now begin to hog out material going up to these lines. As you get closer you will want to go slower so you don’t inadvertently take more out than you wanted to. Go slow and feel for the high spots.

This is something where the real skill in a luthier lies. You have to learn by doing. Seeing how Mike carves his necks gives me a whole new perspective on the subject. My necks in the past were boxy and chunky. Mike’s are so much more elegant and really feel good when holding. This neck shape is what I will try to strive for in the future.
Mike let me pick out some Madagasscar ebony for my fretboard. Since, I am using a different scale length than he has I will have to cut it myself. Mike cuts his frets on a table saw set-up, while I will be cutting with a Japanese fret saw and a metal square.

5. Glue tenon into the neck mortise

Saturday, April 3, 2010

More Pics to Previous Post


Fitting the Neck to Body


Mike is still training me in carving the neck. Today he showed me how to feel the shape and not to just rely on how it looks. It may look like its ok but if you feel the shape you can feel little flat spots here and there. Here you are really being sensitive to the shape you are trying to get.

After getting everything pretty much everything cut and carved the way you want the neck (peghead shape cut, fretboard width, length of neck carved, and back of shoulders completed on peghead, leaving only the heel to shape) you are ready to fit the neck to the body.

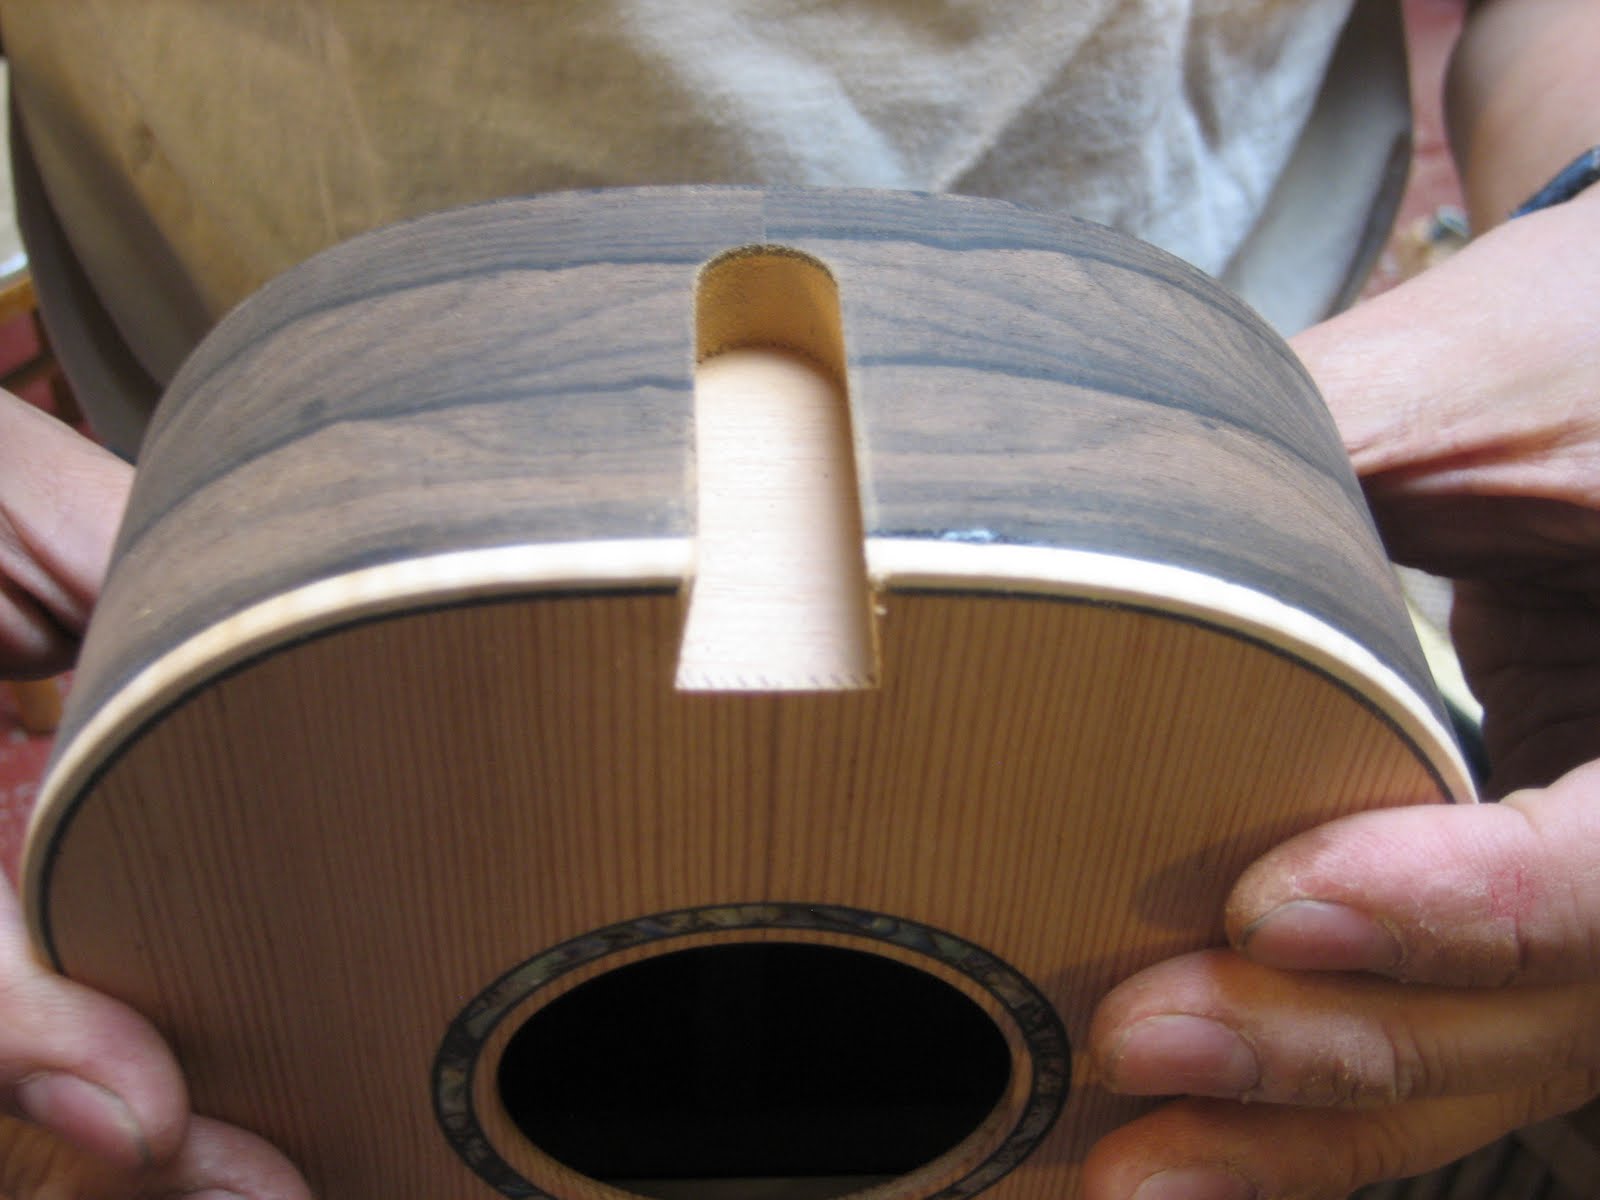
1. Draw the centerline on the body. Mike has a jig he made himself to align the uke body in order to cut a dovetail into it. See above photo. Jig is slid across router table cutting into the body with a dovetail bit.

2. The bottom of the heel is then cut to the shape of the body of the uke by placing (attaching with double stick tape) the neck onto a template which will route out the shape.

3. Width of sides of body at head is measured to know how wide the heel should be. That same width is adjusted to the fence on the bandsaw and the heel end of neck is cut off for the same measure.

4. Bottom of neck heel is refined further with a little curved sandpaper block the same curvature as the top of body.

5. Check how straight the neck is to the body by holding neck to body and checking with a long straightedge. Keep refining bottom of heel of the neck by chiseling if you have to. The bottom of the neck heel has to fit the body until the straightedge lines up making one straight line from neck to the body. Mike says a positive curve is ok meaning the neck needs to come forward to the body, but if it’s negative (neck needs to lean back) you’re in trouble. I don’t know why but I’ll take his word for it.

6. When neck is fit to body where you want it (lined up and centered to uke body) the neck is then routed out the same way as the body but the bit is a little smaller and routes it in a step to accommodate the heel shape.

7. A plug is shaped to accommodate the two mortises in the neck and body and will hold the two units (neck and body) together.

8. End of heel is slanted to slant of body and a heel cap is glued on. The heel is now ready to be shaped after glue is dry.

Yea! It’s finally getting finished! I am excited to inlay my orchid that I have cut for the peghead, so I am anxious to get the veneer glued onto the peghead. When Mike and I get together again it will be to shape the heel, cut fret slots into fretboard and glue fretboard onto the neck.


Starting to Carve the Neck


Today I start to carve the neck. Mike showed me how to make ¼’ marks on the middle of the sides and then carve out a 45 degree angle to both the sides. He tells me to just shape the middle the way you want it then the top will follow suit. It’s hard for me to explain how his exact carving methodology is but you can see for yourself at:

http://www.youtube.com/watch?v=hTcddGUB9gA (for Part 1) & http://www.youtube.com/watch?v=Yj8F_r-2USM&feature=related (for Part 2)

I had a great lesson today. Mike showed me how to hold the rasp (he uses a Nicholson #50 Rasp for rough cutting) and then the angle I should hold the rasp at certain points in carving the neck. Thank you for the lesson, Mike! Now I feel more confident in attempting to carve a ukulele neck.