


Mike is still training me in carving the neck. Today he showed me how to feel the shape and not to just rely on how it looks. It may look like its ok but if you feel the shape you can feel little flat spots here and there. Here you are really being sensitive to the shape you are trying to get.
After getting everything pretty much everything cut and carved the way you want the neck (peghead shape cut, fretboard width, length of neck carved, and back of shoulders completed on peghead, leaving only the heel to shape) you are ready to fit the neck to the body.
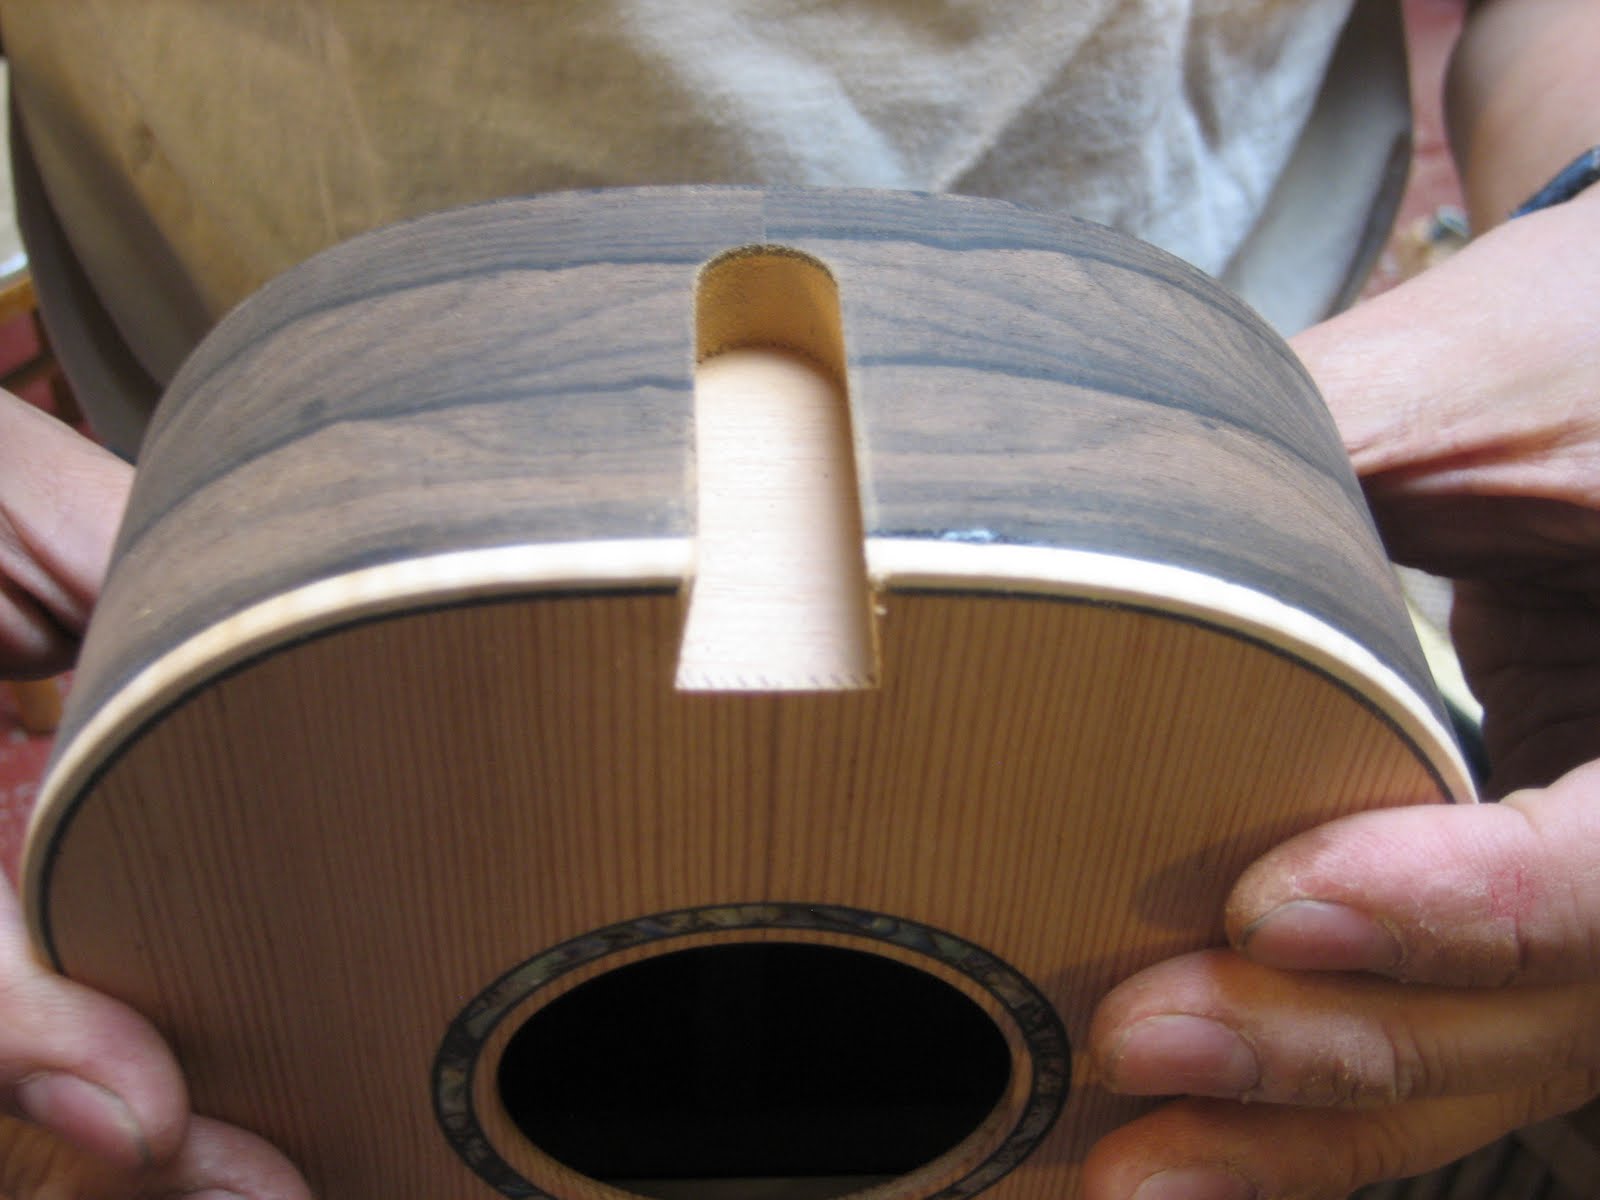
1. Draw the centerline on the body. Mike has a jig he made himself to align the uke body in order to cut a dovetail into it. See above photo. Jig is slid across router table cutting into the body with a dovetail bit.
2. The bottom of the heel is then cut to the shape of the body of the uke by placing (attaching with double stick tape) the neck onto a template which will route out the shape.
3. Width of sides of body at head is measured to know how wide the heel should be. That same width is adjusted to the fence on the bandsaw and the heel end of neck is cut off for the same measure.
4. Bottom of neck heel is refined further with a little curved sandpaper block the same curvature as the top of body.
5. Check how straight the neck is to the body by holding neck to body and checking with a long straightedge. Keep refining bottom of heel of the neck by chiseling if you have to. The bottom of the neck heel has to fit the body until the straightedge lines up making one straight line from neck to the body. Mike says a positive curve is ok meaning the neck needs to come forward to the body, but if it’s negative (neck needs to lean back) you’re in trouble. I don’t know why but I’ll take his word for it.
6. When neck is fit to body where you want it (lined up and centered to uke body) the neck is then routed out the same way as the body but the bit is a little smaller and routes it in a step to accommodate the heel shape.
7. A plug is shaped to accommodate the two mortises in the neck and body and will hold the two units (neck and body) together.
8. End of heel is slanted to slant of body and a heel cap is glued on. The heel is now ready to be shaped after glue is dry.
Yea! It’s finally getting finished! I am excited to inlay my orchid that I have cut for the peghead, so I am anxious to get the veneer glued onto the peghead. When Mike and I get together again it will be to shape the heel, cut fret slots into fretboard and glue fretboard onto the neck.

No comments:
Post a Comment